

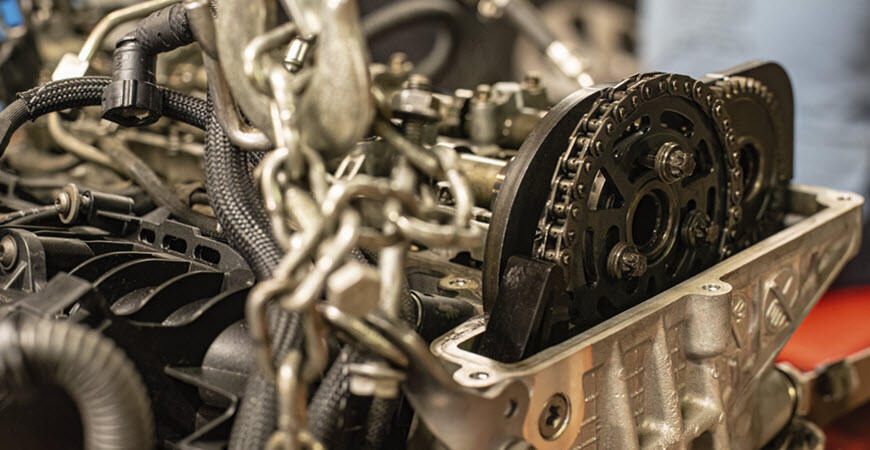
Your engine’s timing chain keeps valves and pistons in perfect sync—but without a healthy tensioner, that chain can slacken, jump teeth, or even snap. A worn tensioner doesn’t just cause rattling noises; it risks bending valves, destroying pistons, or leaving you stranded. The fix? Replace it before disaster strikes. And with HTL’s torque-controlled tools, you’ll nail the installation every time.
Timing chain tensioners use hydraulic pressure or springs to keep the chain taut. Over time, wear from heat, oil degradation, or poor maintenance leads to:
Chain slack: Causes erratic valve timing and misfires.
Guide rail damage: Metal-on-metal grinding creates debris.
Total chain failure: The chain skips or snaps, destroying the engine.
Spot the Warning Signs Early:
Rattling on startup (especially when cold).
Check engine light (codes like P0016 or P0017).
Metal shavings in oil from chain/guide wear.
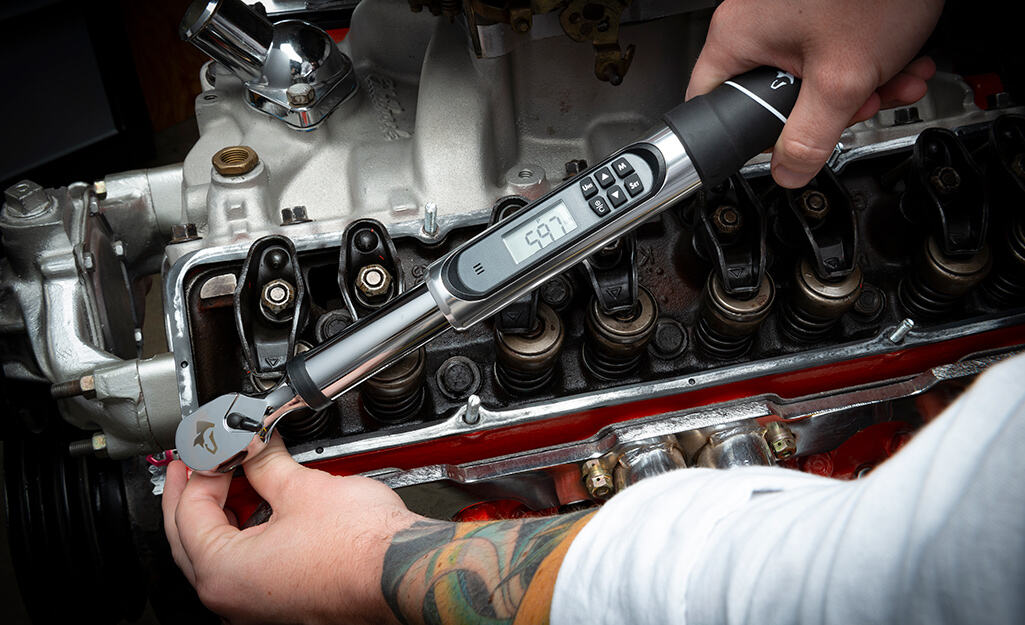
Guessing bolt tightness is a recipe for disaster. Too loose, and vibrations loosen the tensioner. Too tight, and you crack the housing. HTL’s torque-controlled installation tools eliminate the guesswork by:
Delivering precise torque to match OEM specs.
Preventing overtightening that warps components.
Ensuring even pressure for perfect alignment.
1. Prep the Engine
Disconnect the battery and drain the oil.
Remove the timing cover (refer to your vehicle’s manual).
2. Remove the Old Tensioner
Relieve chain tension (use a chain wedge tool if needed).
Unbolt the tensioner carefully—avoid dropping debris into the engine.
3. Install the New Tensioner with HTL Tools
Clean the mounting surface to ensure a flush fit.
Hand-tighten bolts first, then use HTL’s torque wrench to secure them in a crisscross pattern (e.g., 18–22 ft-lbs for most engines).
4. Reassemble and Test
Reinstall the timing cover and refill with fresh oil.
Start the engine and listen for silence—no more rattling!
Reusing old bolts: Stretched bolts won’t hold proper torque.
Skipping the torque wrench: “Feel” isn’t reliable for critical components.
Ignoring chain wear: Replace the chain and guides if they’re damaged.
Accuracy: Hit exact torque specs every time.
Durability: Built for daily shop abuse.
Versatility: Compatible with most engine models.

Hangzhou Hongtu Machinery Co.,Ltd: Pioneers in the automotive industry,supplying high-quality tools for global auto repair tasks since 2013.
12 Households, Group 13, Zhabei Village, Hangzhou, Zhejiang, China
Copyright © Hangzhou Hongtu Machinery Equipment Co.,Ltd. All Rights Reserved - Privacy Policy


