

The fuel pump is the lifeline of your vehicle’s engine, delivering pressurized fuel from the tank to the injectors. A failing pump can starve your engine of fuel, causing poor acceleration, stalling, or even complete breakdowns. Using specialized extraction tools ensures a safe, efficient replacement process and restores optimal fuel pressure.
Modern fuel pumps are durable but wear out over time due to contaminants, overheating, or electrical issues. Low fuel pressure is often the first sign of trouble, leading to:
Engine misfires or hesitation.
Difficulty starting, especially in cold weather.
Reduced fuel efficiency.
Common Culprits:
Clogged fuel filters straining the pump.
Corroded wiring or connectors.
Running the tank consistently low (causing overheating).
Before replacing the pump, confirm it’s the root cause:
Step 1: Check Fuel Pressure
Use a fuel pressure gauge on the fuel rail (consult your vehicle’s specs for target PSI).
Low pressure confirms pump failure.
Step 2: Inspect Electrical Connections
Test the pump’s voltage and ground with a multimeter.
Listen for a humming sound when turning the ignition (a silent pump is likely dead).
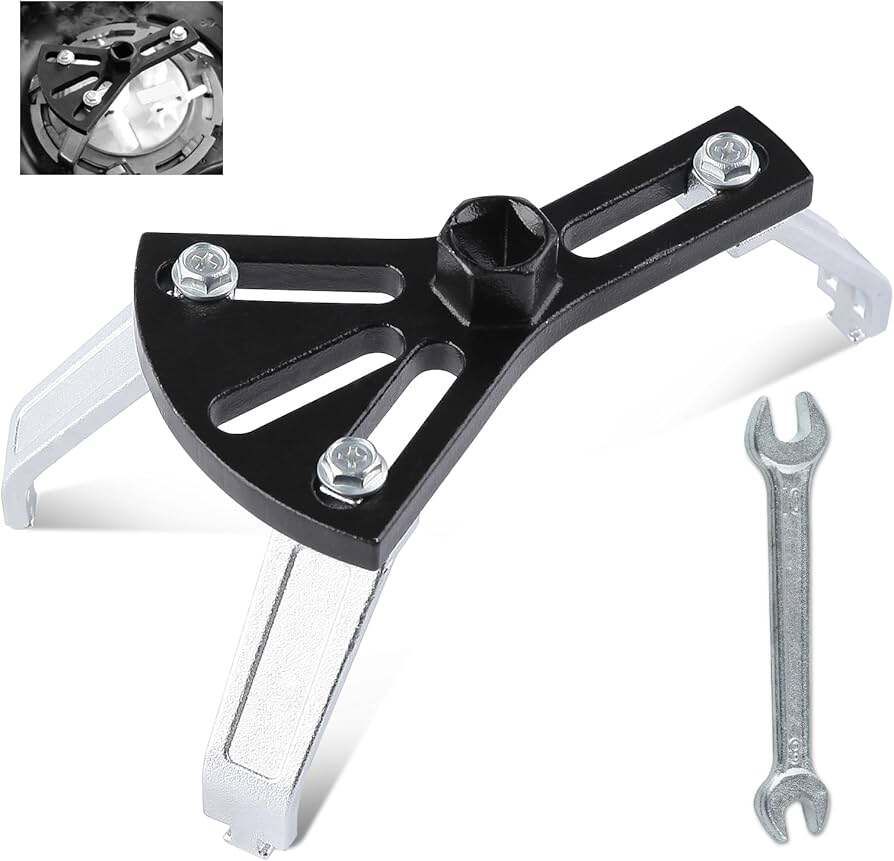
Specialized tools minimize risks of damaging the fuel tank or components:
Must-Have Tools:
Fuel pump extraction kit (with lock-ring wrench and pump puller).
Fuel line disconnect tools (to avoid breaking fragile connectors).
Pressure gauge (for pre- and post-installation checks).
Non-sparking tools (to prevent ignition hazards).
New fuel filter and O-rings (to prevent leaks).
1. Safety First
Disconnect the battery and relieve fuel system pressure (locate the fuse or depressurize via the fuel rail).
Work in a well-ventilated area away from sparks or flames.
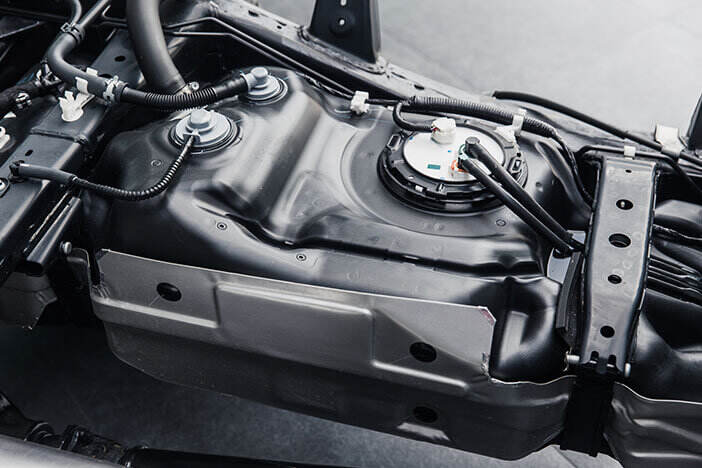
2. Access the Fuel Pump
Remove the rear seat or trunk liner to access the pump assembly (varies by vehicle).
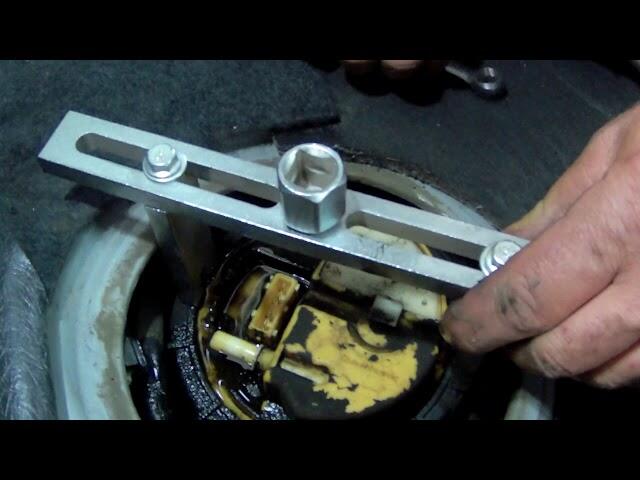
Use a lock-ring wrench to unlock the retaining ring.
3. Extract the Old Pump
Attach the pump puller tool to gently lift the assembly from the tank.
Disconnect fuel lines and electrical connectors carefully.
4. Install the New Pump
Replace the filter and O-rings on the new assembly.
Lower the pump into the tank and secure the lock ring.
5. Test for Leaks and Pressure
Reconnect the battery and prime the pump (turn the ignition on/off 3–4 times).
Use a pressure gauge to verify proper PSI.
Forcing the lock ring: Use the correct tool to prevent stripping.
Skipping the fuel filter: A clogged filter will strain the new pump.
Ignoring O-rings: Damaged seals cause leaks and fire hazards.
Prevent tank damage: Pump pullers avoid prying or hammering.
Ensure a tight seal: Proper tools secure the lock ring evenly.
Save time: Designed for precision, reducing trial and error.
A failing fuel pump leaves your engine gasping for fuel. By using specialized tools and following this guide, you’ll eliminate low-pressure issues, improve performance, and avoid roadside breakdowns.
Q: How often should a fuel pump be replaced?
A: Most last 100,000+ miles, but replace immediately if pressure drops or symptoms arise.
Q: Can I replace a fuel pump without dropping the tank?
A: Yes, if your vehicle has an access panel under the rear seat or trunk.
Q: Why does my new pump still have low pressure?
A: Check for clogged lines, faulty relays, or a defective fuel pressure regulator.
By mastering this repair, you’ll keep your engine fed, powerful, and ready for the road. 🚗⛽🛠️

Hangzhou Hongtu Machinery Co.,Ltd: Pioneers in the automotive industry,supplying high-quality tools for global auto repair tasks since 2013.
12 Households, Group 13, Zhabei Village, Hangzhou, Zhejiang, China
Copyright © Hangzhou Hongtu Machinery Equipment Co.,Ltd. All Rights Reserved - Privacy Policy


