

Universal joints (U-joints) are critical for transferring power in driveshafts, but replacing them often turns into a frustrating battle. Traditional methods like hammering, vise grips, or makeshift tools risk damaging yokes, bending shafts, or injuring technicians due to slippage. HTL’s CV axle locking pliers eliminate these risks with a non-slip grip and controlled force, transforming U-joint replacement into a smooth, damage-free process.
U-joints endure immense torque and vibration, making them prone to seizing. When standard tools slip during removal or installation, they cause:
Scored yoke ears: Compromises the joint’s seating and alignment.
Bent retaining clips: Leads to premature joint failure.
Stuck needle bearings: Forces disassembly of the entire driveshaft.
Common Pain Points:
Stripped snap rings from misaligned tools.
Uneven pressure distorting the yoke’s cross-hole.
Time wasted repositioning slipping clamps.
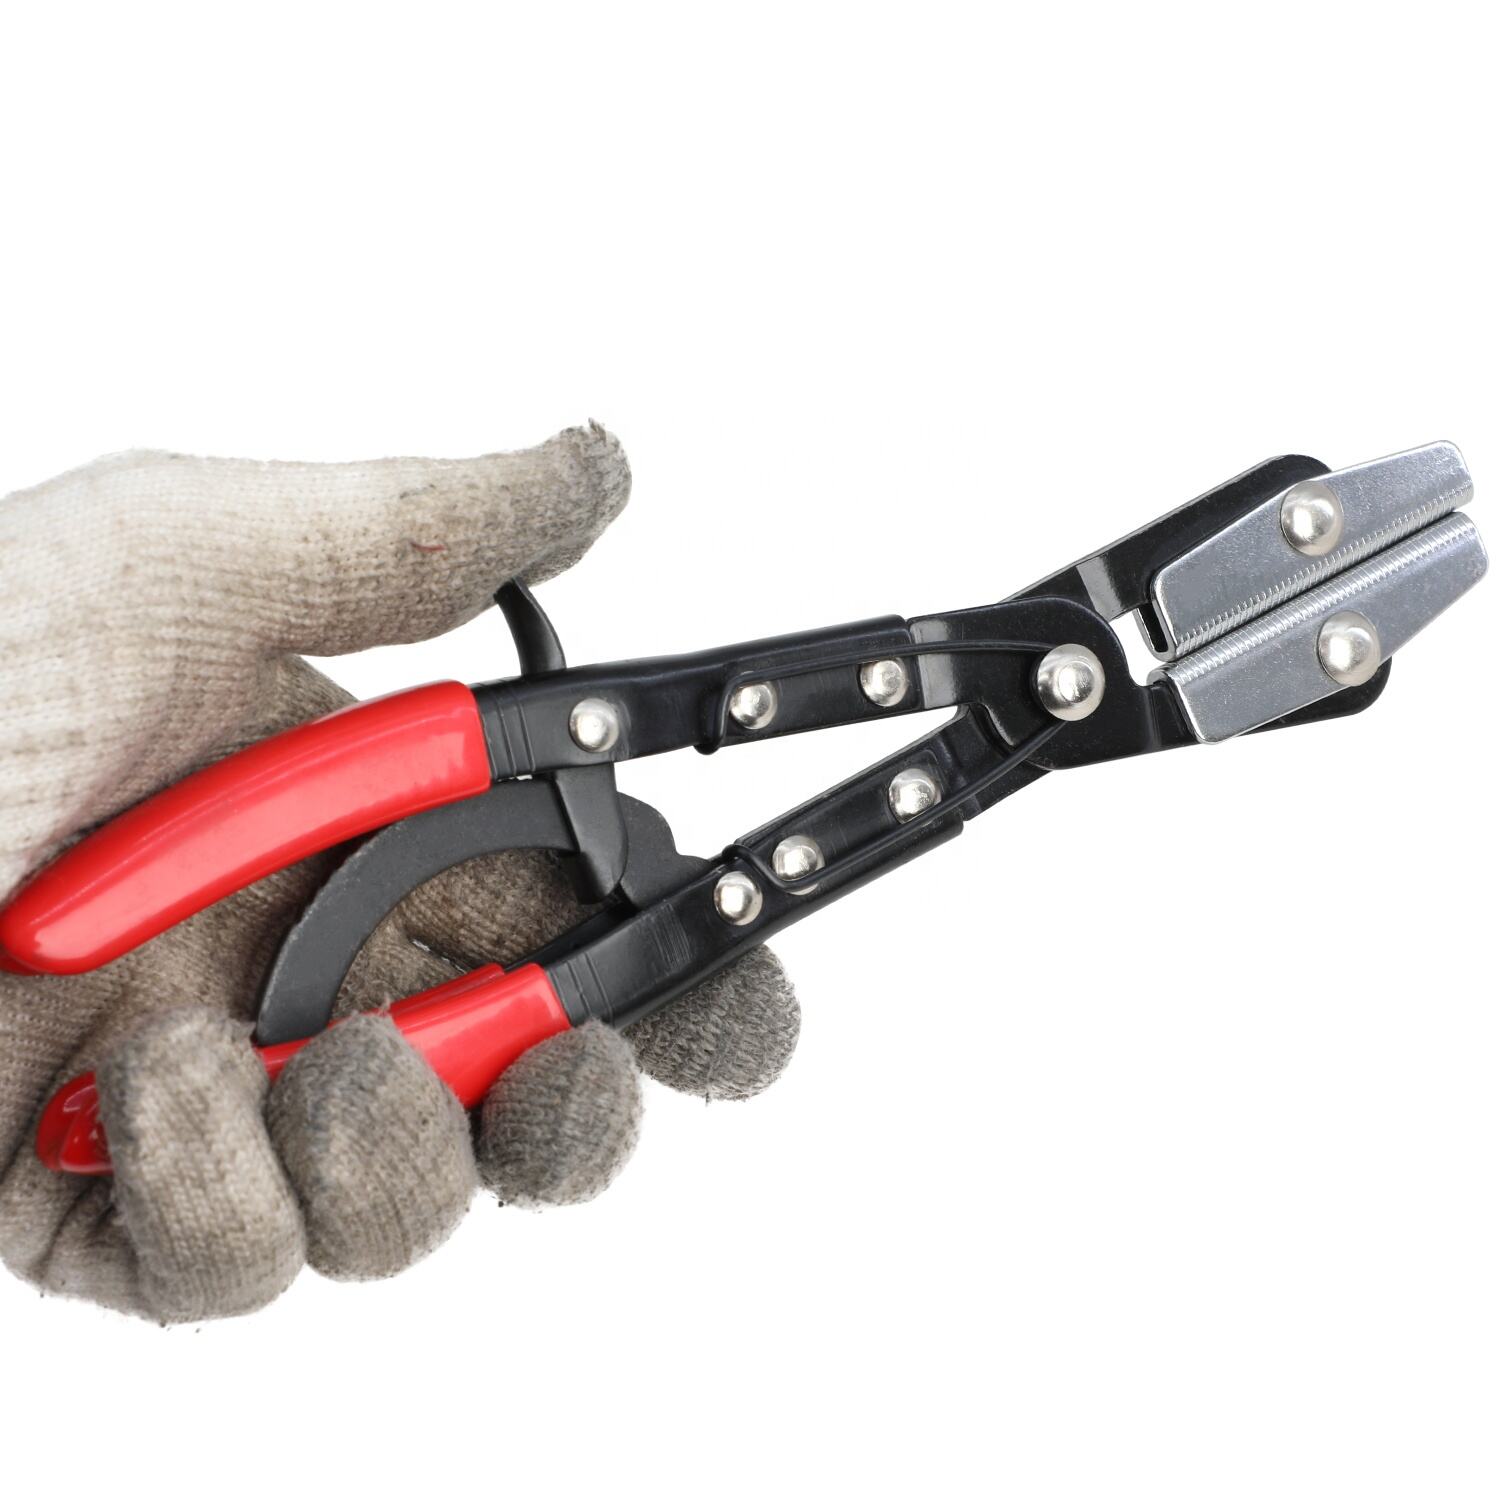
HTL’s pliers are purpose-built for U-joint work, featuring:
Laser-etched jaws: Diamond-pattern teeth bite into yokes without marring surfaces.
Adjustable clamping force: Torque-limiting design prevents over-tightening.
360° swivel head: Maintains grip on awkward angles during driveshaft removal.
Heat-treated alloy: Withstands 2,000+ lbs of force without flexing.
1. Secure the Driveshaft
Mount the shaft in a vise with HTL’s rubber-lined jaws to prevent surface scratches.
For CV axles, use HTL’s axle stand to maintain alignment.
2. Remove Snap Rings
Grip the snap ring with HTL’s micro-tip pliers designed for tight spaces.
Avoid prying with screwdrivers, which can deform the ring groove.
3. Press Out the Old U-Joint
Attach HTL’s locking pliers to the yoke ears for stabilization.
Use a U-joint press kit to evenly push the joint out, guided by the pliers’ grip.
4. Install the New Joint
Align the new U-joint and apply lithium grease to needle bearings.
Reverse the pressing process, using the pliers to prevent yoke distortion.
5. Validate and Reassemble
Check joint articulation for smooth movement.
Reinstall the driveshaft and test under load (avoid high speeds initially).
| Factor | Vise Grips/Hammers | HTL Locking Pliers |
|---|---|---|
| Grip Stability | Low (slips under force) | High (laser-etched teeth lock firmly) |
| Yoke Damage Risk | 60–70% (scoring/bending) | <5% (controlled force distribution) |
| Time per Joint | 45–60 minutes (rework common) | 20–30 minutes (streamlined process) |
| Tool Longevity | 6–12 months (jaw wear) | 5+ years (industrial-grade materials) |
Hammering joints out: Shock forces crack yokes or dislodge bearings.
Ignoring yoke alignment: Misalignment accelerates U-joint wear.
Skipping grease: Dry needle bearings seize within weeks.
Versatility: Compatible with CV axles, driveshafts, and steering linkages.
Safety: Reduces hand injuries from slipped tools.
Cost-effective: One tool replaces hammers, clamps, and cheater bars.
U-joint replacement shouldn’t be a gamble. With HTL’s locking pliers, shops achieve flawless repairs, protect components, and build trust through reliability.
Upgrade your toolkit with HTL’s CV axle locking pliers. Contact us for fleet pricing!
Q: Can HTL pliers handle rusted U-joints?
A: Yes—pair with HTL’s penetrating oil for stubborn corrosion.
Q: Are these pliers suitable for DIYers?
A: Absolutely—ergonomic design requires minimal technician strength.
Q: Do they work on ATV or tractor driveshafts?
A: Yes—multiple jaw sizes accommodate diameters from 1" to 4".
With HTL’s precision, every U-joint replacement becomes a testament to craftsmanship. 🚜🔧✨

Hangzhou Hongtu Machinery Co.,Ltd: Pioneers in the automotive industry,supplying high-quality tools for global auto repair tasks since 2013.
12 Households, Group 13, Zhabei Village, Hangzhou, Zhejiang, China
Copyright © Hangzhou Hongtu Machinery Equipment Co.,Ltd. All Rights Reserved - Privacy Policy


