Have you ever thought about how critical brake pads are to your vehicle's safety and performance? Replacing them may seem daunting, but with the right tools and guidance, it can be a straightforward task. In this blog, we will provide a step-by-step guide on how to replace brake pads, emphasizing the efficiency and ease provided by our precision tools.
[Table of Contents]
- Understanding the Importance of Brake Pads
- Essential Tools for Brake Pad Replacement
- Step-by-Step Guide to Replacing Brake Pads
- Tips for Using Our Precision Tools Effectively
- Common Issues and Solutions
- Conclusion
Understanding the Importance of Brake Pads
Brake pads are essential components of your vehicle's braking system. They create friction against the brake rotors, allowing your vehicle to slow down or stop effectively.
Key Functions of Brake Pads
- Safety: Worn-out brake pads can lead to increased stopping distances and reduced braking power, posing a significant safety risk.
- Performance: Quality brake pads ensure smooth and responsive braking, enhancing overall driving experience.
Essential Tools for Brake Pad Replacement
Before you start, gather the following tools to make the process efficient and hassle-free:
- Jack and Jack Stands: To safely lift and support your vehicle.
- Lug Wrench: For removing wheel nuts.
- Socket Set: To remove caliper bolts.
- C-Clamp or Caliper Tool: For retracting the caliper piston.
- Brake Cleaner: To clean components before reassembly.
- Precision Torque Wrench: To ensure bolts are tightened to manufacturer specifications.
Our Precision Tools
Our specialized tool kit includes high-quality caliper tools and torque wrenches designed for easy use, ensuring you can complete the job efficiently.
Step-by-Step Guide to Replacing Brake Pads
Follow these steps for a successful brake pad replacement:
-
Preparation:
- Park your vehicle on a flat surface and engage the parking brake.
- Gather all necessary tools and materials.
-
Loosen Lug Nuts:
- Use a lug wrench to slightly loosen the lug nuts on the wheel you will be working on, but do not remove them yet.
-
Lift the Vehicle:
- Use a jack to lift the vehicle and secure it with jack stands for safety.
-
Remove the Wheel:
- Fully remove the loosened lug nuts and take off the wheel to access the brake assembly.
-
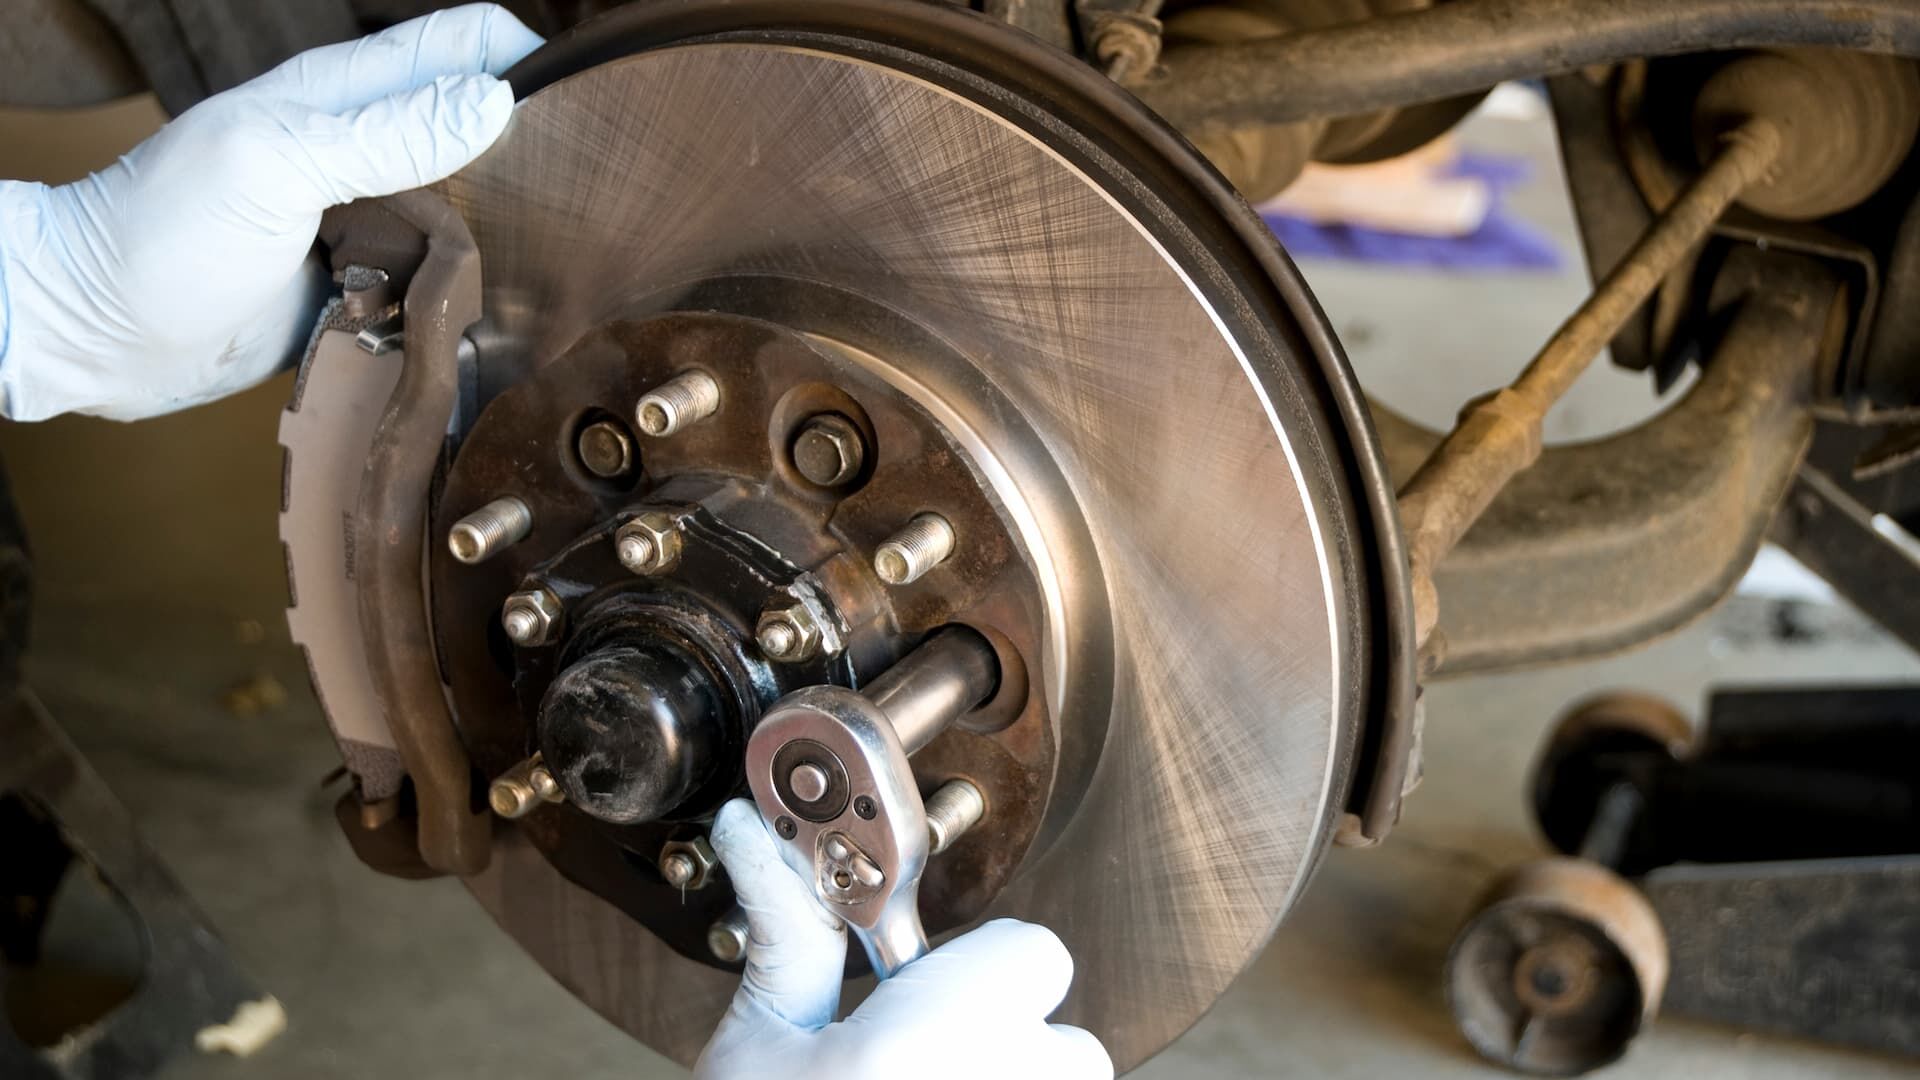
Remove Caliper Bolts:
- Use a socket wrench to remove the bolts securing the caliper in place. Carefully slide the caliper off the rotor without straining the brake line.
-
Remove Old Brake Pads:
- Slide out the old brake pads from their brackets. If they are stuck, gently pry them out with a flathead screwdriver.
-
Inspect Components:
- Check the caliper and rotor for wear or damage. Clean any debris or dust using brake cleaner.
-
Retract Caliper Pistons:
- Use a C-clamp or caliper tool to gently push back the caliper pistons into their housing, making space for new pads.
-
Install New Brake Pads:
- Place new brake pads into their designated slots in the caliper bracket, ensuring they are positioned correctly.
-
Reattach Caliper:
- Carefully slide the caliper back over the new brake pads and rotor, aligning it with its mounting points.
- Reinstall and tighten caliper bolts using our precision torque wrench to ensure they are securely fastened.
-
Reinstall Wheel:
- Put the wheel back on and hand-tighten lug nuts before lowering the vehicle back to the ground.
-
Tighten Lug Nuts:
- Once on solid ground, use your torque wrench to tighten lug nuts to manufacturer specifications in a crisscross pattern for even tightening.
-
Test Brakes:
- Before driving, pump the brakes several times to ensure proper seating of new pads and restore brake pressure.
Tips for Using Our Precision Tools Effectively
- Follow Instructions: Always refer to your vehicle’s manual for specific guidance related to your model.
- Keep Tools Organized: An organized workspace helps you work efficiently without searching for misplaced tools.
- Wear Safety Gear: Always wear gloves and safety glasses when working on your brakes to protect yourself from dust and debris.
Common Issues and Solutions
During brake pad replacement, you may encounter some common challenges:
-
Stuck Caliper Bolts:
- If bolts are difficult to remove, apply penetrating oil and allow it to sit before attempting again.
-
Brake Warning Light Remains On:
- If this occurs after replacement, check that all connections are secure and that no sensors were disturbed during installation.
Conclusion
Replacing brake pads is an essential maintenance task that ensures your vehicle remains safe and performs optimally. With our precision tools and this comprehensive guide, you can master brake pad replacement with confidence and ease. Regular maintenance not only enhances safety but also prolongs the life of your braking system—so don’t delay!